http://social.technet.microsoft.com/wiki/contents/articles/2554.ad-fs-2-0-how-to-replace-the-ssl-service-communications-token-signing-and-token-decrypting-certificates.aspx
Replacing the SSL and Service Communications certificate
*Note - Replacing the SSL and Service Communications certificates go hand-in-hand. Any time you are replacing one of these certificates, you must also replace the other. SSL certificates exist on all Federation Servers and Federation Server Proxy servers. Service Communications certificates only exist on Federation Servers.
1.
Obtain a new certificate with the following requirements a.
Enhanced Key Usage is at least
Server Authentication. If you are obtaining this from an internal MS Exterprise CA, the
Web Server template will work fine.
b.
Subject or
Subject Alternative Name (SAN) must contain the DNS name of your Federation Service or an appropriate wildcard name
Example: sso.contoso.com or *.contoso.com
c. You may wish to generate the certificate request and mark the private key exportable so that you can move the certificate from one server to others in the case when you have a Federation Server farm or at least one Federation Server Proxy.
d. Take note of which server was used to generate the certificate request. The private key is generated and stored here. When you receive the certificate from the issuing CA, you will need to bring that file back to the server where the request was initiated so that you can create a private/public key pair.
e. The issuing CA that you choose is important because your Federation Server(s), Federation Server Proxy(ies), and all clients accessing your Federation Service must be able to chain to a trusted root certification authority when validating the SSL certificate. Customers will typically use a 3rd party, public CA for the SSL and Service Communications certificate.
2.
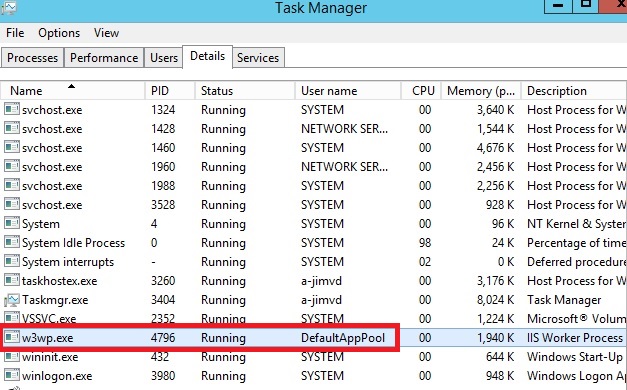
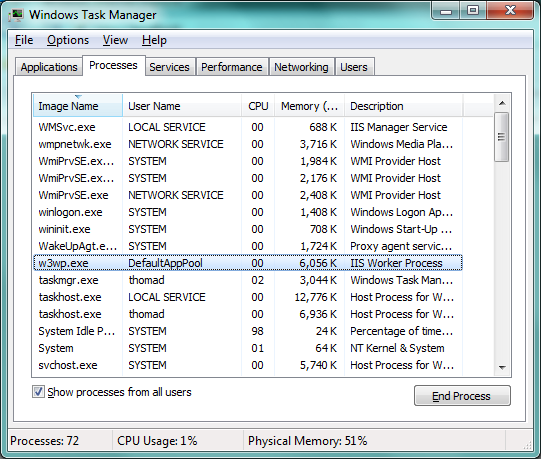
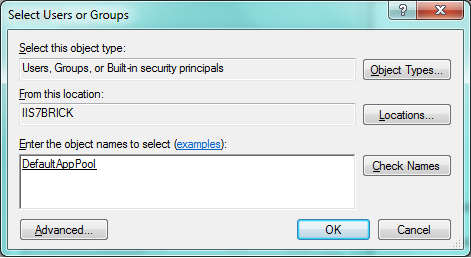
ACL the SSL and Service Communications certificate to allow Read access for the AD FS 2.0 service account*Note - This step must be completed on all Federation Servers only.
a. Click
Start,
Run, type
MMC.exe, and press
Enter
b. Click
File,
Add/Remove Snap-in
c. Double-click
Certificates
d. Select
Computer account and click
Next e. Select
Local computer and click
Finish f. Expand
Certificates (Local Computer), expand
Personal, and select
Certificates
g. Right-click your new SSL and Service Communications certificate, select
All Tasks, and select
Manage Private Keys
h.
Add Read access for your AD FS 2.0 service account and click
OK i. Close the Certificates MMC
3.
Bind the new SSL and Service Communications certificate to the web site in IIS which hosts the Federation Service*Note - This step must be completed on all Federation Servers and Federation Server Proxy servers.
a. In
IIS7 on
Windows Server 2008 and
Windows Server 2008 R2, you will select the web site, right-click,
Edit Bindings, and select the SSL port,
Edit, and use the drop-dwon to select the new
SSL certificate:
 *Note
*Note - Be careful when making your certificate selection. Your old SSL certificate and new SSL certificate will likely have the same subject name and/or friendly name, and this may make it difficult to differentiate between the two certificates. When in doubt, use thumbprint matching (see the
Thumbprint Matching section at the end of this article).
4.
Set a new Service Communications certificate in the AD FS 2.0 Management console*Note - This step needs to be completed just one time on a single Federation Server in the farm. Proxies are not involved here, and other Federation Servers in a farm will pick up this change automatically.
a. Launch
AD FS 2.0 Management from the
Administrative Tools menu
b. Expand
Service and select
Certificates c. In the
Actions pane, click
Set Service Communications Certificate...

d. You will be presented with a list of certificates that are valid for Service Communications. If you find that your new certificate is not being presented in the list, you need to go back and make sure that a. the certificate is in the local computer Personal store with private key associated, and b. the certificate has the Server Authentication EKU.
e. Select your new Service Communications certificate and click
OK* Note: Be careful when making your certificate selection. Your old Service Communications certificate and new Service Communications certificate might have the same subject name and/or friendly name, and this may make it difficult to differentiate between the two certificates. When in doubt, use thumbprint matching (see the
Thumbprint Matchingsection at the end of this article).

5.
Test SSL functionality for internal and external users to ensure that SSL is working as expected on the Federation Servers and the Federation Server Proxy servers.
Replacing the Token-Signing certificate
*Note - If you are utilizing the
AutoCertificateRollover feature of AD FS 2.0, you do not need to manually replace the Token-Signing certificate. AutoCertificateRollover will create a self-signed Token-Signing certificate for you and set it as the Primary Token-Signing certificate when a time threshold has been met. The new Token-Signing certificate is published in your Federation Metadata, and Relying Party (RP) partners who can consume Federation Metadata will automatically pick up the change whenever they pull your Federation Metadata document. You should work with your RP partners to see how often they pull for Federation Metadata so that, in the event of a certificate replacement, they will experience little to no downtime before trusting your new certificate. If your RP partners cannot consume Federation Metadata, you should be aware of when AutoCertificateRollover will set a new Primary Token-Signing certificate and you will need to plan accordingly to send the public key portion of this certificate to your RP partners.
1.
Check to see if you are utilizing AutoCertificateRollover a. Launch
PowerShell on a Federation Server
b. Run the following commands:
Add-Pssnapin Microsoft.Adfs.Powershell
Get-ADFSProperties c. Look for the value of
AutoCertificateRollover in the output. It will show
True or
False d. If the result of step c. is
True, then you are finished, and you should take special note of everything in the
*Noteabove. If the result of step c. is
False, then you will need to maintain the Token-Signing certificate manually, and you should move on to the next step.
2.
Obtain a new certificate with the following requirements a. It is common to think that a specific
Enhanced Key Usage (EKU) is needed for the Token-Signing certificate, but this is, in fact, not correct. The only requirement for usage is that
Key Usage (KU) must contain at least
Digital Signature. We have seen a lot of customers go through the trouble of obtaining a Code Signing EKU certificate. Again,
EKU is not required for Token-Signing.
b.
Subject and/or
Subject Alternative Name (SAN) does not matter. We recommend using something like "AD FS Token-Signing" or "Contoso SSO Token-Signing" so that you know exactly what the certificate is used for when you see it.
c. Take note of which server was used to generate the certificate request. The private key is generated and stored here. When you receive the certificate from the issuing CA, you will need to bring that file back to the server where the request was initiated so that you can create a private/public key pair.
d. When choosing an issuing CA, remember that only your Federation Servers, your RP Federation Servers and RP applications need to be able to chain to a trusted root certification authority when validating your Token-Signing certificate. You could save on the cost of a 3rd party certificate by using an internal PKI-issued certificate or a self-signed certificate. If you choose to use an internal PKI, your Federation Servers, RP Federation Servers and RP applications must trust your PKI root. If you choose to use a self-signed certificate, your Federation Servers and Resource Partner Federation Servers must import the self-signed certificate to the Trusted Root Certification Authorities store in order to trust the self-signed certificate.
3.
Decide how your RP partners will trust the new Token-Signing certificate
RP partners who can consume Federation Metadata
You should replace the Token-Signing certificate and instruct the RP partners to pull for your new Federation Metadata to pick up the new certificate.
RP partners who can NOT consume Federation MetadataYou must manually send them the public key of your new Token-Signing Certificate. Send your new Token-Signing certificate
public key (.cer file or .p7b if you wish to include the entire chain) to all of your
RPs. Have the partner implement changes on their side to trust the new certificate. If the RP partner is using AD FS 2.0, the following will apply.
On the RP partner AD FS 2.0 server: a. Launch
AD FS 2.0 Management from the
Administrative Tools menu
b. Expand
Trust Relationships, select
Claims Provider Trusts, and select the trust that was created for you
c. Right-click the trust name and select
Properties d. Select the
Certificates tab and
Add the new Token-Signing certificate
e. Click
OK

4.
Add the new Token-Signing certificate a. Launch
AD FS 2.0 Management from the
Administrative Tools menu
b. Expand
Service and select
Certificates c. In the
Actions pane, click
Add Token-Signing Certificate... d. You will be presented with a list of certificates that are valid for Token-Signing. If you find that your new certificate is not being presented in the list, you need to go back and make sure that a. the certificate is in the local computer Personal store with private key associated, and b. the certificate has the
Digital Signature KU.
e. Select your new Token-Signing certificate and click
OK* Note: Be careful when making your certificate selection. Your old Token-Signing certificate and new Token-Signing certificate might have the same subject name and/or friendly name, and this may make it difficult to differentiate between the two certificates. When in doubt, use thumbprint matching (see the
Thumbprint Matching section at the end of this article).

5.
ACL the private key to allow Read access to the AD FS 2.0 service account a. When you add a new Token-Signing certificate, you receive a warning reading: "Ensure that the private key for the chosen certificate is accessible to the service account for this Federation Service on each server in the farm":

b. Click
Start,
Run, type
MMC.exe, and press
Enter
c. Click
File,
Add/Remove Snap-in
d. Double-click
Certificates
e. Select
Computer account and click
Next f. Select
Local computer and click
Finish g. Expand
Certificates (Local Computer), expand
Personal, and select
Certificates
h. Right-click your new Token-Signing certificate, select
All Tasks, and select
Manage Private Keys
i.
Add Read access for your AD FS 2.0 service account and click
OK j. Close the Certificates MMC
6.
Set the new Token-Signing certificate as Primary a. With the Certificates node in AD FS 2.0 Management selected, you should now see two certificates listed under Token-Signing:
i. Your old Token-Signing certificate
ii. Your new Token-Signing certificate
b. Select your new Token-Signing certificate, right-click, and select
Set as primary c. Leave the old certificate as secondary for rollover purposes. You should plan to remove the old certificate once you are confident it is no longer needed for rollover, or when the certificate has expired.
i. Current users' SSO sessions are signed and possibly also encrypted using the OLD certificate
ii. Current AD FS 2.0 Proxy Trust relationships utilize tokens that are signed and encrypted using the OLD certificate

7. Test the new Token-Signing certificate by sending a SAML assertion to your RP partners and RP applications
Replacing the Token-Decrypting certificate
*Note - If you are utilizing the
AutoCertificateRollover feature of AD FS 2.0, you do not need to manually replace the Token-Decrypting certificate. AutoCertificateRollover will create a self-signed Token-Decrypting certificate for you and set it as the Primary Token-Decrypting certificate when a time threshold has been met. The new Token-Decrypting certificate is published in your Federation Metadata, and Claims Provider (CP) partners who can consume Federation Metadata will automatically pick up the change whenever they pull your Federation Metadata document. You should work with your CP partners to see how often they pull for Federation Metadata so that, in the event of a certificate replacement, they will experience little to no downtime before utilizing your new certificate for token encryption. If your CP partners cannot consume Federation Metadata, you should be aware of when AutoCertificateRollover will set a new Primary Token-Decrypting certificate and you will need to plan accordingly to send the public key portion of this certificate to your CP partners.
1.
Check to see if you are utilizing AutoCertificateRollover a. Launch
PowerShell on a Federation Server
b. Run the following commands:
Add-Pssnapin Microsoft.Adfs.Powershell
Get-ADFSProperties c. Look for the value of
AutoCertificateRollover in the output. It will show
True or
False d. If the result of step c. is
True, then you are finished, and you should take special note of everything in the
*Noteabove. If the result of step c. is
False, then you will need to maintain the Token-Decrypting certificate manually, and you should move on to the next step.
2.
Obtain a new certificate with the following requirements a. It is common to think that a specific
Enhanced Key Usage (EKU) is needed for the Token-Decrypting certificate, but this is, in fact, not correct. The only requirement for usage is that
Key Usage (KU) must contain at least
Key Encipherment. We have seen a lot of customers go through the trouble of obtaining a Code Signing EKU certificate. Again,
EKU is not required for Token-Decrypting.
b.
Subject and/or
Subject Alternative Name (SAN) does not matter. We recommend using something like "AD FS Token-Decrypting" or "Contoso SSO Token-Decrypting" so that you know exactly what the certificate is used for when you see it.
c. Take note of which server was used to generate the certificate request. The private key is generated and stored here. When you receive the certificate from the issuing CA, you will need to bring that file back to the server where the request was initiated so that you can create a private/public key pair.
d. When choosing an issuing CA, remember that only your Federation Servers and CP partners need to be able to chain to a trusted root certification authority when validating your Token-Decrypting certificate. You could save on the cost of a 3rd party certificate by using an internal PKI-issued certificate or a self-signed certificate. If you choose to use an internal PKI, your Federation Servers and CP partners must trust your PKI root. If you choose to use a self-signed certificate, your Federation Servers and CP partners must import the self-signed certificate to the Trusted Root Certification Authorities store in order to trust the self-signed certificate.
3.
Decide how your CP partners will trust the new Token-Decrypting certificate
CP partners who can consume Federation Metadata
You should replace the Token-Decrypting certificate and instruct the CP partners to pull for your new Federation Metadata to pick up the new certificate.
CP partners who can NOT consume Federation MetadataYou must manually send them the public key of your new Token-Decrypting certificate. Send your new Token-Decrypting certificate
public key (.cer file or .p7b if you wish to include the entire chain) to all of your
CPs. Have the partner implement changes on their side to trust the new certificate. If the CP partner is using AD FS 2.0, the following will apply.
On the CP partner AD FS 2.0 server: a. Launch
AD FS 2.0 Management from the
Administrative Tools menu
b. Expand
Trust Relationships, select
Relying Party Trusts, and select the trust that was created for you
c. Right-click the trust name and select
Properties d. Select the
Encryption tab and click
Browse... to select the new Token-Decrypting certificate
e. Click
OK

4. Add the new Token-Decrypting certificate a. Launch AD FS 2.0 Management from the Administrative Tools menu
b. Expand Service and select Certificates c. In the Actions pane, click Add Token-Decrypting certificate...
d. You will be presented with a list of certificates that are valid for Token-Decrypting. If you find that your new certificate is not being presented in the list, you need to go back and make sure that a. the certificate is in the local computer Personal store with private key associated, and b. the certificate has the Key Encipherment KU.
e. Select your new Token-Decrypting certificate and click OK
* Note: Be careful when making your certificate selection. Your old Token-Decrypting certificate and new Token-Decrypting certificate might have the same subject name and/or friendly name, and this may make it difficult to differentiate between the two certificates. When in doubt, use thumbprint matching (see theThumbprint Matching section at the end of this article).

5. ACL the private key to allow Read access to the AD FS 2.0 service account a. When you add a new Token-Decrypting certificate, you receive a warning reading: "Ensure that the private key for the chosen certificate is accessible to the service account for this Federation Service on each server in the farm":
b. Click Start, Run, type MMC.exe, and press Enter c. Click File, Add/Remove Snap-in d. Double-click Certificates e. Select Computer account and click Next f. Select Local computer and click Finish g. Expand Certificates (Local Computer), expand Personal, and selectCertificates
h. Right-click your new Token-Decrypting certificate, select All Tasks, and select Manage Private Keys
i. Add Read access for your AD FS 2.0 service account and click OK
j. Close the Certificates MMC
6. Set the new Token-Decrypting certificate as Primary a. With the Certificates node in AD FS 2.0 Management selected, you should now see two certificates listed under Token-Decrypting:
i. Your old Token-Decrypting certificate
ii. Your new Token-Decrypting certificate
b. Select your new Token-Decrypting certificate, right-click, and select Set as primary c. Leave the old certificate as secondary for rollover purposes. You should plan to remove the old certificate once you are confident it is no longer needed for rollover, or when the certificate has expired.
i. Current users' SSO sessions are signed and possibly also encrypted using the OLD certificate
ii. Current AD FS 2.0 Proxy Trust relationships utilize tokens that are signed and encrypted using the OLD certificate

7. Test the new Token-Decrypting certificate by having your CP partners send you an encrypted SAML assertion
More Information
Thumbprint Matching
1. View the properties of the certificate (double-click the certificate in the Certificates MMC or in Windows Explorer. Within an application interface, you may be presented with a control to View Certificate or similar).
2. Select the
Details tab
3. Scroll down to the
Thumbprint property and select it:

4. Take note of the first 4 characters and the last 4 characters (this usually gives us a good idea of thumbprint uniqueness)
Example from the screenshot above: 92 e3 and d8 6c
5. Repeat steps 1-4 on another certificate and compare the noted values
Were you looking for AD FS 1.x information regarding certificate replacement?
AD FS 1.0 and 1.1: How to Replace the SSL, Token-Signing, and Federation Server Proxy Certificates -http://social.technet.microsoft.com/wiki/contents/articles/ad-fs-1-0-and-1-1-how-to-replace-the-ssl-token-signing-and-federation-server-proxy-certificates.aspx
Have you recently enabled AutoCertificateRollover and you need to immeditately self-sign new Token-Signing and Token-Decrypting certificates?
AD FS 2.0: How to Enable and Immediately Use AutoCertificateRollover -http://social.technet.microsoft.com/wiki/contents/articles/ad-fs-2-0-how-to-enable-and-immediately-use-autocertificaterollover.aspx

![Console1 - [Console RootSecurity TemplatesDSecurity]](http://thommck.files.wordpress.com/2011/12/console1-console-rootsecurity-templatesdsecurity.png "Console1 - [Console RootSecurity TemplatesDSecurity]")
![Console1 - [Console RootSecurity Configuration and Analysis]](http://thommck.files.wordpress.com/2011/12/console1-console-rootsecurity-configuration-and-analysis.png "Console1 - [Console RootSecurity Configuration and Analysis]")

![Console1 - [Console RootSecurity Configuration and AnalysisSystem Services]](http://thommck.files.wordpress.com/2011/12/console1-console-rootsecurity-configuration-and-analysissystem-services.png "Console1 - [Console RootSecurity Configuration and AnalysisSystem Services]")
